Qualità
Prodotti meticolosamente scelti!
Pistola spara carte da gioco
When you want it done right...Do It Yourself!
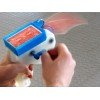
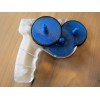
This Gatling-gun style card shooter will liven up your bridge game - just turn the crank and deal your next hand at 30 MPH! The crank is connected to an eccentric feed wheel that feeds one card per revolution. The drive wheel at the business end is geared up by 25:1 to reach speeds of more than 3000 RPM. Pulling the trigger drops the deck onto the feed wheel, and then watch the cards fly! This thing is designed so it will fit on a 150mm x 150mm print bed.
CAUTION: Do not shoot at humans, animals or siblings - you could put an eye out.
Instructions
Update: I've added a "topcard" piece which is a weighted card loaded with pennies to add some downward force on the feed wheel. This greatly improves the feeding reliability.
You'll need the following parts:
7 - 608ZZ bearings 2 - 330 Dash no. O-rings 13 - 4-40 x 1/4" screws 1 - 4-40 x 1" flathead screw 1 - #4 washer 1 - Standard poker-sized deck of cards (textured finish cards work best)
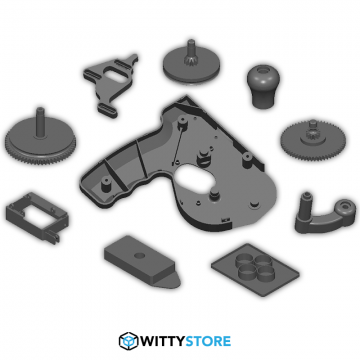
All parts were printed in PLA with 0.2mm layer thickness, 3 perimeters and 20% infill. Use a perimeter line width of 0.4mm for optimal printing. The drive wheel, the cluster gear, the eccentric wheel, the trigger and the tray all require supports, but they should break away easily. The right side, left side, crank, knob and stop parts print without supports. If your printer does not have a heated bed, print the parts with a raft to make sure they come out flat.

Watch the video: https://youtu.be/IAqOGs5mrKg
Assembly: Put one O-ring in the groove of the drive wheel and the other O-ring in the groove of the eccentric wheel. (UPDATE: Apply some superglue to the 1" long screw and insert it into the center hole in the gear-side of the eccentric wheel. This will greatly strengthen the crank shaft.) Inserting bearings in bottom sides of the eccentric wheel, the cluster gear and the drive wheel.
On the left side, break the end leaf spring loose and flex it back & forth to make sure it is detached from the body of the part. Hold the leaf spring flexed back while inserting the trigger over the 3 screw bosses. Screw the trigger down with 3 of the screws. Make sure the trigger and leaf spring operate smoothly. Place the eccentric hub and bearing on the post at the "muzzle" end of the shooter. Place the cluster gear and bearing on the middle post. Place the eccentric wheel and bearing on the post towards the handle. Put bearings on the post ends of the eccentric wheel, cluster gear and drive wheel. Place the right side on top of the assembly, sliding the bearings into the matching cavities. Screw the two sides together. There are three screw holes on the right side face, and one screw hole at the front end of the shooter. Slide the stop piece into the tray with the finger pointing down and flat side of the finger facing the inside of the tray. Secure with a screw and washer. Make sure the end of the screw does not stick into the tray cavity. Flex the ears on the end of the tray apart slightly and slide in the last bearing. Attach the tray to the body with 4 screws. The back end of the tray should be resting against the body. Adjust the height of the front of the tray so that the bearing is just barely touching the O-ring on the drive wheel. (Too much contact pressure will make the crank very hard to turn.) Slide the knob onto the end of the crank and secure with a screw. Make sure the knob spins freely. Slide the crank onto the end of the shaft sticking out from the eccentric wheel and secure with the last screw. Place the deck of cards in the tray. With the trigger pulled, adjust the stop up or down so that just one card can slip under the tip of the stop. Place the topcard piece (with each pocket loaded with 5 pennies) on top of the deck. Operation: The trigger piece has a nub on the end which pushes the deck up away from the eccentric feed wheel. When the trigger is pulled, the deck drops down in contact with the eccentric. Turning the crank rotates the eccentric O-ring, which rises up from the body as it rotates forward. If the trigger is pulled, the bottom card will be pushed forward until it is pinched between the high-speed drive wheel and the bearing, and then launched out the front. The drive wheel is off-center, and there is also a slot in the side of the tray, so that as the card is driven forward, it also rotates. This rotation is what makes the card cut through the air like a frisbee rather than just fluttering aimlessly.
Tips: If your bearings are lubricated with grease instead of oil, wash out the grease with WD-40. At high speeds, the grease will give you too much rolling resistance. If you happen to have bearings with rubber seals instead of sheilds (like me) remove the rubber seals to reduce the rolling resistance. Lubricate the gears with a little light grease or Vaseline. Do not turn the crank more than 2-3 rev/second - trying to go faster will either break the crank shaft of melt the PLA gears.
Good print and enjoy!

Playing Card Shooter by Jeff Kerr is licensed under a Creative Commons Attribution-NonCommercial 4.0 International License.
Scrivi una recensione
Nome:La Tua Recensione: Nota: Il codice HTML non viene tradotto!
Punteggio: Negativo Positivo
Inserire il codice nella casella seguente:


